Audi Q7: Interior Rearview Mirror, Removing and Installing
Special tools and workshop equipment required
- Angled Screwdriver -VAS6416-
 Caution
This procedure contains mandatory replaceable parts. Refer to component overview prior to starting procedure.
Mandatory Replacement Parts
- Clip for interior rearview mirror
Removing
 WARNING
Follow the safety precautions for the automatic dimming interior rearview mirror. Refer to → Chapter "Automatic Dimming Interior Rearview Mirror Safety Precautions".
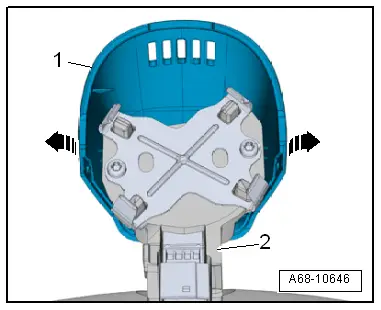
- Pivot the interior rearview mirror downward until stop, approximately 25º.
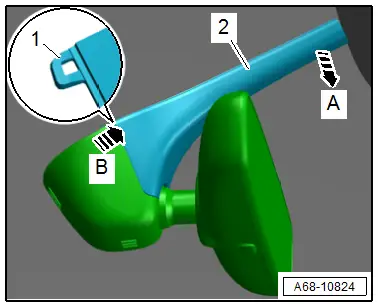
- Pull the rear cover -2- downward in direction of -arrow A- and at the same time release the catches -1- by pressing firmly on the cover in direction of -arrow B-.
- Disengage the cover from the mirror base and remove.
Interior Rearview Mirror with Optional Equipment:
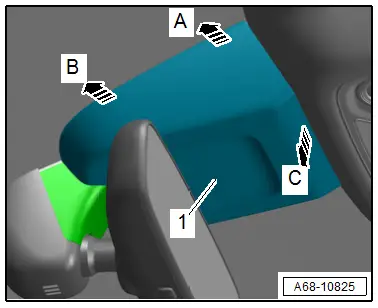
- To unclip the cover in direction of -arrows A, B and C- insert the -VAS6416- carefully between the windshield and the cover.
- Repeat the process on the opposite side.
- Disengage the front cover -1- and remove toward the rear.
- Pull the rear cover -2- downward in direction of -arrow A- and at the same time release the catches -1- by pressing firmly on the cover in direction of -arrow B-.
- Disengage the cover from the mirror base and remove.
Continuation for all Mirror
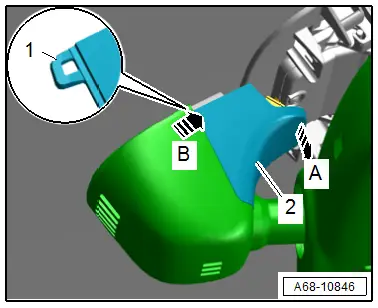
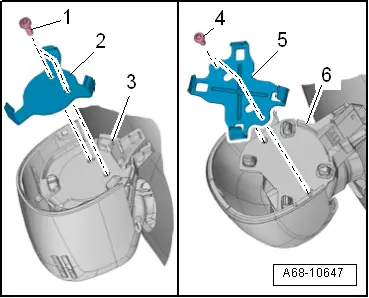
- Place a screwdriver between the retaining plate and the mirror base.
- Carefully turn the screwdriver on its axis in direction of -arrow A-, until the retaining tab disengages from the baseplate.
- At the same time turn the mirror base -1- counterclockwise in direction of -arrow B- until it stops.
- Remove the interior rearview mirror from the baseplate and disconnect the connector -2-.
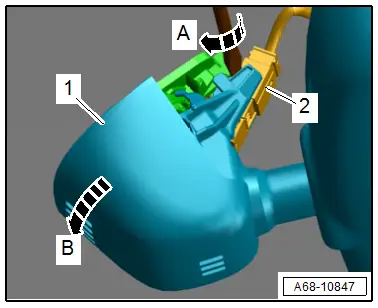
- Carefully disengage the tabs in direction of -arrows- and remove the front cover -1- downward out of the guide rods on the interior rearview mirror base -2-.
Installing
Install in reverse order of removal and note the following:
- Replace the clip -2 or 5- after removing the interior rearview mirror. Refer to the Parts Catalog for the allocation.
- Position the interior rearview mirror turned 20º with respect to the installation position.
- Turn the interior rearview mirror counterclockwise until it stops.
 Note
Note
If the interior rearview mirror with integrated Automatic High Beam Assist Control Module -J844- is replaced select the function "control module, replacing" of the respective control module using the Vehicle Diagnostic Tester Diagnostic.
Installation notes, for example tightening specifications, replacing components. Refer to → Chapter "Overview - Interior Rearview Mirror".

