Audi Q7: Fender, Removing and Installing
Removing
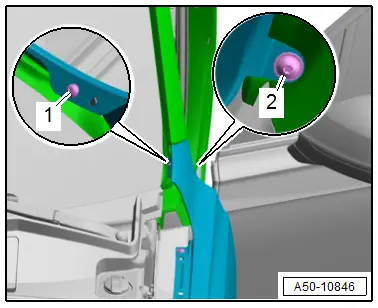
- Remove the drip rail. Refer to → Chapter "Drip Rail, Removing and Installing".
- Remove the bolt -1-.
- Open the front door.
- Remove the bolt -2-.
- Remove the rear cover for the fender. Refer to → Chapter "Rear Fender Cover, Removing and Installing".
- Remove the wheel cover. Refer to → Chapter "Wheel Cover, Removing and Installing, Front ".
- Remove the bumper cover mount. Refer to → Chapter "Bumper Cover Mount, Removing and Installing".
- Remove the windshield washer fluid reservoir. Refer to → Electrical Equipment; Rep. Gr.92; Windshield Washer System; Washer Fluid Reservoir, Removing and Installing.
- Remove the bolts -1 and 2-.
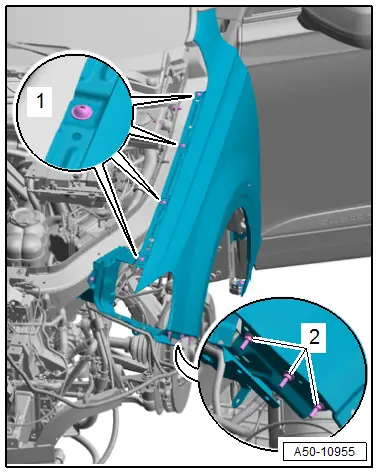
- Remove the bolts -2 and 3-.
- Remove the fender -1-.
Installing
Install in reverse order of removal.
Tightening Specifications
- Refer to → Chapter "Overview - Fender"
Fender Brace, Removing and Installing
Removing
- Remove the bumper cover mount. Refer to → Chapter "Bumper Cover Mount, Removing and Installing".
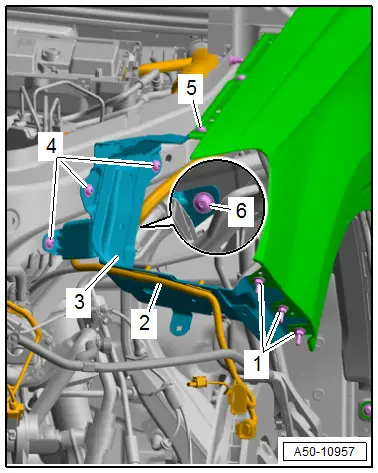
- Free up the wiring harness -2-.
- Remove the bolts -1, 4 and 5-.
- Remove the fender brace -3-.
Installing
Install in reverse order of removal.
Tightening Specifications
- Refer to → Chapter "Overview - Fender"
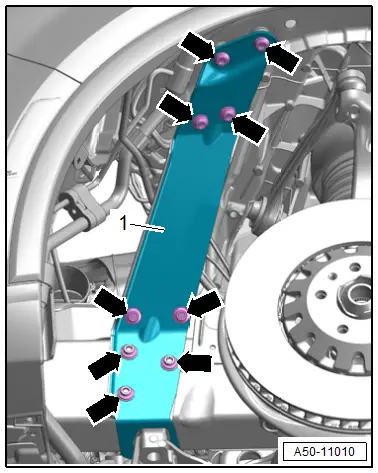
Tension Strut, Removing and Installing
Removing
- Remove the front section of the front wheel housing liner. Refer to → Chapter "Front Wheel Housing Liner, Removing and Installing, Front Section".
- Lower the subframe. Refer to → Suspension, Wheels, Steering; Rep. Gr.40; Subframe; Subframe, Lowering.
- Remove the bolts -arrows-.
- Remove the tension strut -1-.
Installing
Install in reverse order of removal.
Tightening Specifications
- Refer to → Chapter "Overview - Fender"
Wheel Blocker Cover, Removing and Installing
Removing
- Remove the rear section of the front wheel housing liner. Refer to → Chapter "Front Wheel Housing Liner, Removing and Installing, Rear Section".
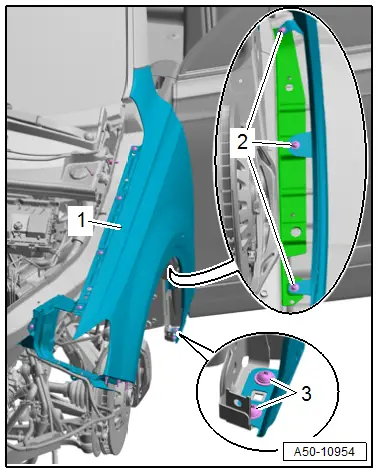
- Remove the bolts -1 and 2-.
- Remove the wheel blocker cover -3-.
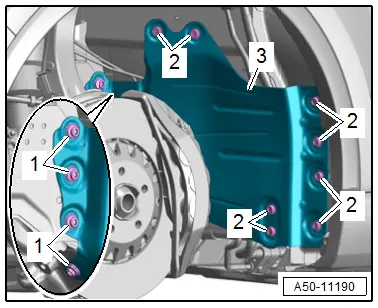
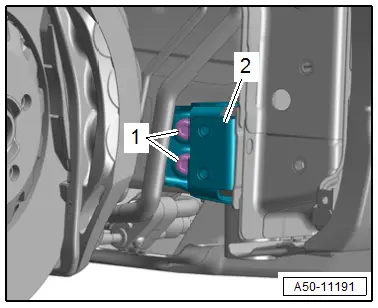
- Remove the bolts -1-.
- Remove the wheel blocker cover support -2-.
Installing
Install in reverse order of removal.
Tightening Specifications
- Refer to → Chapter "Overview - Fender"

