Audi Q7: Overview - Screen Separator
Audi Q7 (4M) 2016-2026 Workshop Manual / Body / Body Interior / Interior Equipment / Overview - Screen Separator
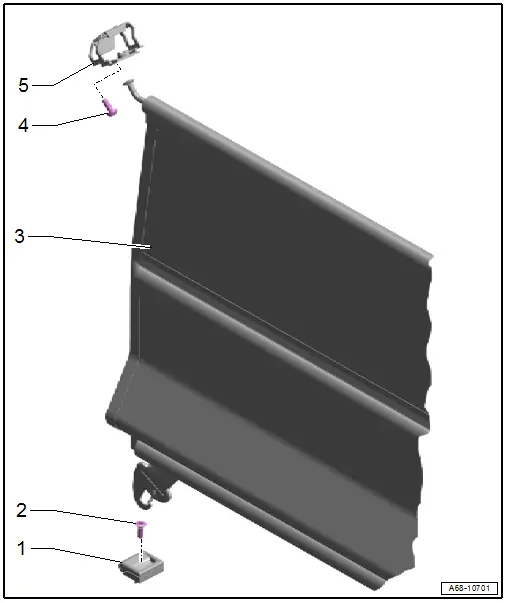
1 - Tie Down
- Quantity: 2 each
- Removing and installing. Refer to → Chapter "Tie Down, Removing and Installing".
2 - Bolt
- Quantity: 2 each
- Tightening specification. Refer to → Chapter "Overview - Luggage Compartment Side Trim Panel, Vehicles without High-Voltage System".
3 - Screen Separator
4 - Bolt
- 9 Nm
- Quantity: 2 each
5 - Mount
- For the screen separator wall
- Quantity: 2 each
- Removing and installing. Refer to → Chapter "Screen Separator Mounting Eye, Removing and Installing".
- Attach the securing tabs to the mounting eyes into the openings in the body
Overview - Sun Visors
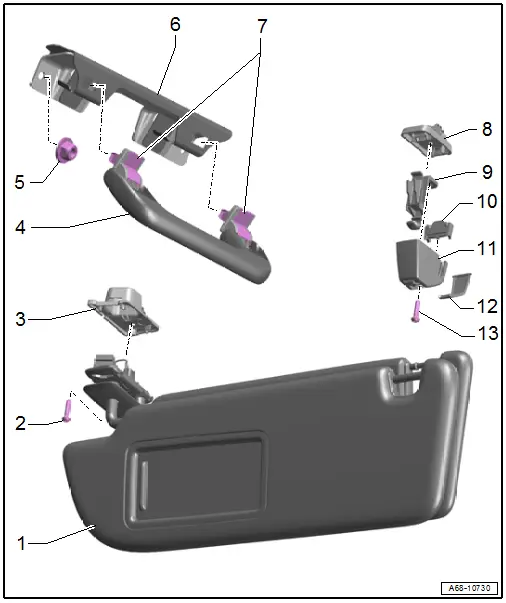
1 - Sun Visor
- Removing and installing. Refer to → Chapter "Sun Visor, Removing and Installing".
2 - Bolt
- 2.5 Nm
3 - Mounting for Sun Visor Mount
- Clip into the opening in the body
4 - Roof Grab Handle
- Quantity: 2 each
- Removing and installing. Refer to → Chapter "Roof Grab Handle, Removing and Installing".
- Press until it engages completely
5 - Nut
- 10 Nm
- Quantity: 2 each
6 - Roof Grab Handle Bracket
- Removing and installing. Refer to → Chapter "Roof Grab Handle Bracket, Removing and Installing".
7 - Expanding Caps
 Caution
Only up to their lock position (do not pull them out all the way otherwise the silicone brake and spring and fall out and then the handle has to be replaced).
- Press until it engages completely
8 - Center Support Mount
- Clip into the opening in the body
9 - Sun Visor Center Support
- Removing and installing. Refer to → Chapter "Sun Visor Center Support, Removing and Installing".
10 - Plug
- Inserted into the cap
11 - Center Bearing Cover
- Clipped into the sun visor center support
- Press until it engages completely
12 - Cap
- Clipped into the sun visor center support
- Press until it engages completely
13 - Bolt
- 2.5 Nm

