Audi Q7: Rear Window Washer System
Overview - Rear Window Washer System
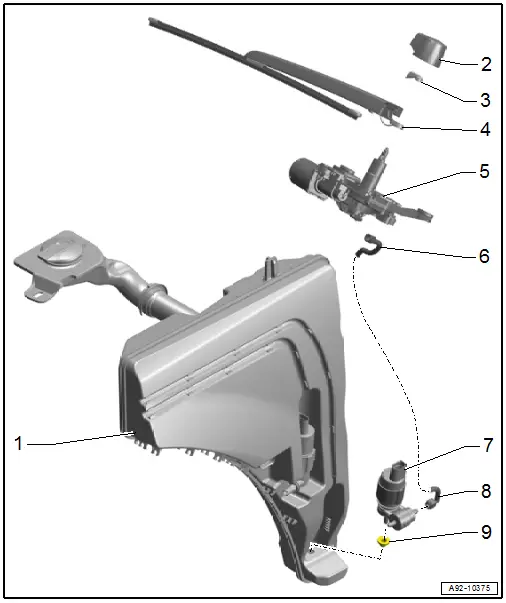
1 - Washer Fluid Reservoir
- Removing and installing. Refer to → Chapter "Washer Fluid Reservoir, Removing and Installing".
2 - Rear Window Cap
3 - Washer Nozzle
- Removing and installing. Refer to → Chapter "Spray Nozzle, Removing and Installing".
- Adjusting. Refer to → Chapter "Spray Nozzle, Adjusting".
4 - Windshield Wiper Arm
5 - Rear Window Wiper Motor -V12-
6 - Washer Fluid Hose
- From the windshield washer pump
7 - Windshield Washer Pump -V5-
- Removing and installing. Refer to → Chapter "Windshield Washer Pump, Removing and Installing".
8 - Washer Fluid Hose
- To the washer nozzle
9 - Grommet
- Replace if damaged.
Spray Nozzle, Removing and Installing
Removing
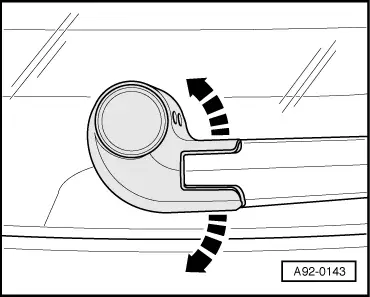
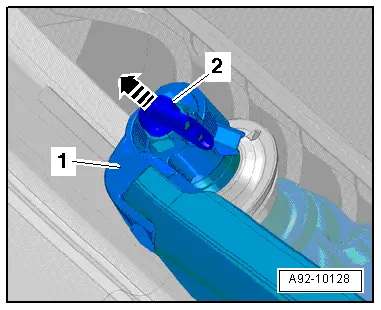
- Carefully expand the cap in direction of -arrows- and remove.
- Carefully remove the spray nozzle -2- from the connecting tube in direction of -arrow-.
Installing
Install in the reverse order of removal while noting the following:
- Insert the spray nozzle so the spray opening faces the opening on the wiper arm -1-.
Spray Nozzle, Adjusting
- Adjust the rear window washer system spray nozzles.
- Clean the dirty washer nozzle if the spray field does not match the specifications.
Washer Nozzle, Cleaning:
 NOTICE
Risk of damaging the washer nozzles by misuse.
- Do not clean the spray nozzles using any objects.
- Remove the washer nozzle. Refer to → Chapter "Spray Nozzle, Removing and Installing".
- Rinse the washer nozzle with clean water opposite the spray direction.
- To remove any remaining contaminants, the washer nozzle may only be blown out with compressed air in the opposite direction of spray.
- If the spray field still does not correspond to the specifications, replace the spray nozzle.

