Audi Q7: Window Regulator, Removing and Installing
Removing
- Remove the door window. Refer to → Chapter "Front Door Window, Removing and Installing".
- Release the retainers -3 and 4- on the threaded pins -2- for the window regulator using an 11 mm socket. To do so, slide the socket onto the threaded pin.
- Unclip the window regulator cable guide clip -1-.
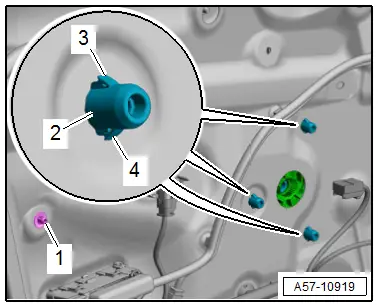
- Remove the plugs -arrows-.
- Loosen the lower nuts -2- only three turns, and remove the upper nuts.
- Remove the window regulator -1- forward from the speaker opening.

Installing
Install in reverse order of removal and note the following:
- The clips for the window regulator threaded pins must engage audibly in the inner door panel.
- The window regulator cable guide clip must be clipped in the inner door panel.
Tightening Specifications
- Refer to → Chapter "Overview - Window Regulator"
Window Regulator Motor, Removing and Installing
Removing
 Note
Note
The window regulator motor can be removed or installed with the motor or door window in any position.
- Remove the front door trim panel. Refer to → Body Interior; Rep. Gr.70; Front Door Trim Panels; Front Door Trim Panel, Removing and Installing.
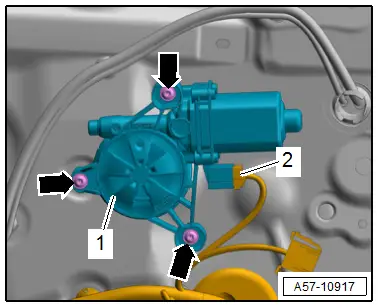
- Disconnect the connector -2-.
- Remove the bolts -arrows- and remove the window regulator motor -1- from the window regulator.
Installing
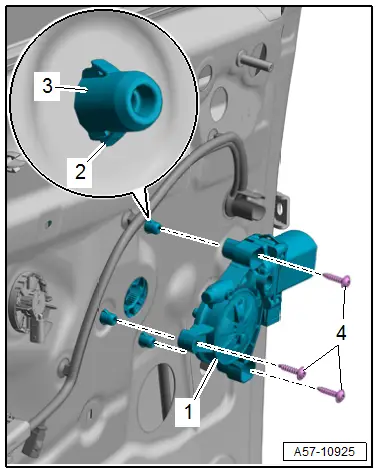
- The clips -2- for the window regulator threaded pins -3- must be engaged in the inner door panel.
- Slide the window regulator motor -1- onto the threaded pins and tighten the bolts -4-.
Further installation is performed in reverse order of removal, while noting the following:
- Activate the one-touch up/down function for the power window regulators. Refer to the Owner's Manual.
Tightening Specifications
- Refer to → Chapter "Overview - Window Regulator"

