Audi Q7: Door Inner Cover, Removing and Installing
Door Inner Cover, Removing and Installing, Versions without Closing Assist
Special tools and workshop equipment required
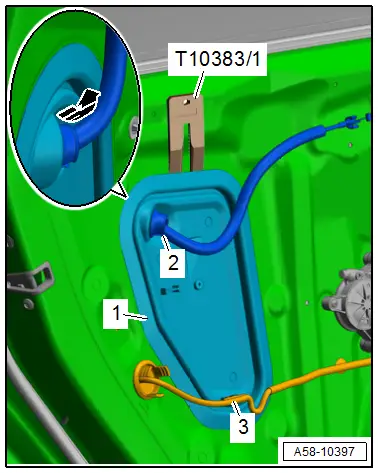
- Wedge Set -T10383-
Removing
- Remove the rear door trim panel. Refer to → Body Interior; Rep. Gr.70; Rear Door Trim Panels; Rear Door Trim Panel, Removing and Installing.
- Free up the wiring harness -3-.
- Pry the door inner cover -1- out of the inner door panel -arrow- using the -T10383/1-.
- Disengage the cable grommet -2- for the interior door mechanism.
Installing
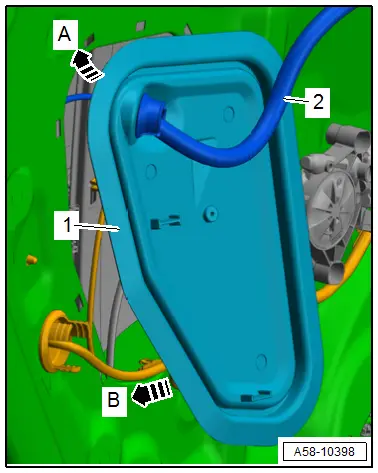
- Bring the cable -2- into the installation position and snap into the grommet in the hole.
- Engage the upper door inner cover -1- on the door inner cover -arrow A- and push on all around until it engages audibly -arrow B-.
- The door inner cover must be installed flush.
Further installation is the reverse order of removal.
Door Inner Cover, Removing and Installing, Versions with Closing Assist
Special tools and workshop equipment required
- Wedge Set -T10383-
Removing
- Remove the rear door trim panel. Refer to → Body Interior; Rep. Gr.70; Rear Door Trim Panels; Rear Door Trim Panel, Removing and Installing.
- Disconnect the connector -3-.
- Release the catch -arrow A- on the cable -2- downward from the support bracket -arrow B-.
- Disengage the cable on the closing assist motor -1-. Refer to → Chapter "Closing Assist Motor, Removing and Installing".

- Free up the wiring harness -3-.
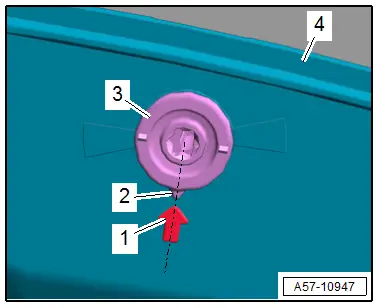
- Turn the expanding pin -arrows- 180º counter-clockwise until the catch removes.
- Pry the door inner cover -1- out of the inner door panel using the -T10383/1-.
- Disengage the grommets -2 and 4- for the cable.

Installing
- Bring the cable into the installation position and snap into the grommets in the holes.
- Push on the door inner cover -4- until it engages and secure using the expanding pins -3-.
- The tab -2- must point to the arrow mark -1-.
- The door inner cover must be installed flush.
- Install the cable for the closing assist motor. Refer to → Chapter "Closing Assist Motor, Removing and Installing".
Further installation is the reverse order of removal.