Audi Q7: Overview - Roof End Strip
Audi Q7 (4M) 2016-2026 Workshop Manual / Body / Body Interior / Interior Trim / Overview - Roof End Strip
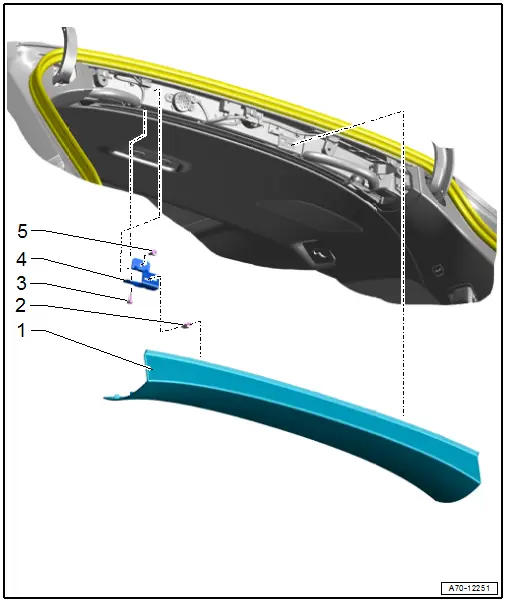
1 - Roof End Strip
- Insert in the D-pillar trim panels and press on it until it audibly engages.
- Stretch the rear lid seal lip
- Removing and installing. Refer to → Chapter "Roof End Strip, Removing and Installing".
2 - Clip
- Quantity: 2
- Insert in the roof end strip
- Remove the clips that are still in the mounting points on the body using the Omega Clip Tool -T40280-.
- Replace damaged or deformed clips
3 - Bolts
- 3.5 Nm
4 - Bracket
- Quantity: 2
5 - Bolts
- 3.5 Nm
Overview - Headliner
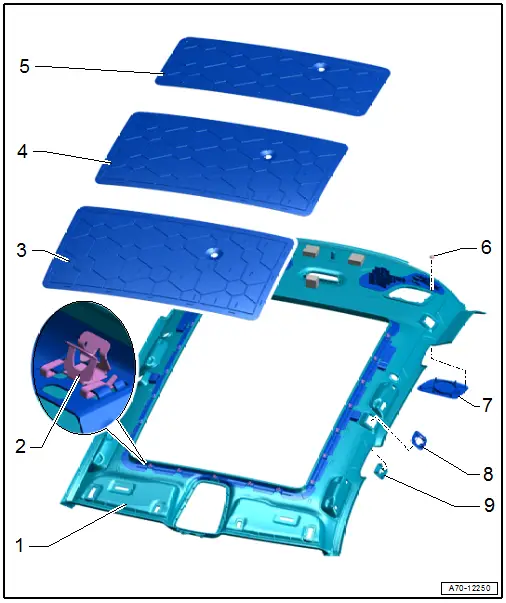
1 - Headliner
- Removing and installing. Refer to → Chapter "Headliner, Removing and Installing".
 Caution
- The headliner bends easily.
- Replace the headliner if it is bent.
2 - Clip
- For versions with panorama roof
- Quantity: 24
- Insert in the headliner
- Replace damaged or deformed clips
3 - Front Roof Reinforcement
- For versions without panorama roof
- Install on the body. Refer to → Chapter "Roof Reinforcement, Attaching to Body".
4 - Center Roof Reinforcement
- For versions without panorama roof
- Install on the body. Refer to → Chapter "Roof Reinforcement, Attaching to Body".
5 - Rear Roof Reinforcement
- For versions without panorama roof
- Install on the body. Refer to → Chapter "Roof Reinforcement, Attaching to Body".
6 - Lock Washer
- 7 each
7 - Speaker Trim
- Equipped on some models
- Removing and installing. Refer to → Chapter "Headliner, Removing and Installing".
8 - Trim Bracket
- For the screen separator wall
- Quantity: 2 each
q Clipped with the trim in the headliner
9 - Trim
- For the screen separator wall
- Quantity: 2 each
- Clipped with the trim bracket in the headliner

