Audi Q7: Lower Longitudinal Member, Removing and Installing
Lower Longitudinal Member, Removing and Installing, Vehicles without High-Voltage System
Removing
- Remove the front noise insulation. Refer to → Chapter "Noise Insulation, Removing and Installing".
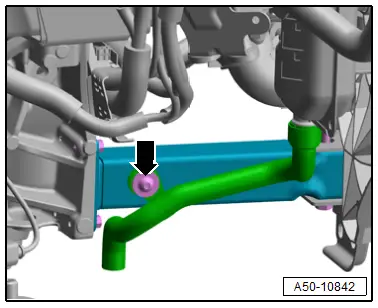
- Versions with parking/auxiliary heater: remove the bolt -arrow- for the parking heater exhaust pipe on the right lower longitudinal member.
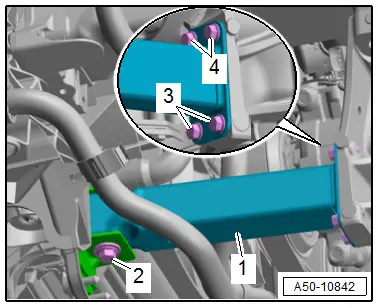
- Remove the bolts -2, 3 and 4- and the lower longitudinal member -1-.

Installing
Install in reverse order of removal.
Tightening Specifications
- Refer to → Chapter "Overview - Lock Carrier"
- Refer to → Heating, Ventilation and Air Conditioning; Rep. Gr.82; Parking/Auxiliary Heater; Component Location Overview - Parking/Auxiliary Heater.
Lower Longitudinal Member, Removing and Installing, Vehicles with High-Voltage System
Removing
- Remove the front noise insulation. Refer to → Chapter "Noise Insulation, Removing and Installing".
Left Side of Vehicle:
- Remove the bolts -1, 2, and 3-.
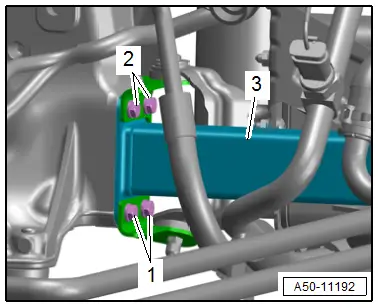
- 6-cylinder engine: remove the bolts -5- and remove the bracket -4-.

- Remove the bolts -1 and 2- and remove the lower longitudinal member -3-.
Right Side of Vehicle:
- Remove the bolt -2- on the lower longitudinal member on the right side for the parking heater exhaust pipe.
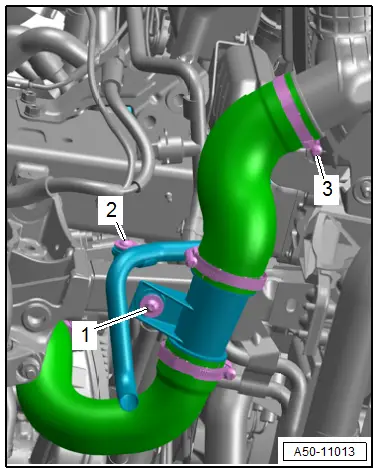
- Loosen the hose clamp -3- and remove the air duct hose.
- Remove the bolt -1- and push the air duct hose to the side.
- Remove the bolts -2, 3 and 4-, and remove the lower longitudinal member -1-.
Installing
Install in reverse order of removal.
Tightening Specifications
- Refer to → Chapter "Overview - Lock Carrier"
- Refer to → Heating, Ventilation and Air Conditioning; Rep. Gr.82; Parking/Auxiliary Heater; Component Location Overview - Parking/Auxiliary Heater.
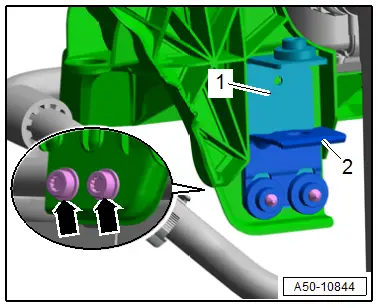
Lower Longitudinal Member Bracket, Removing and Installing
Removing
- Remove the lower longitudinal member. Refer to → Chapter "Lower Longitudinal Member, Removing and Installing".
- Remove the bolts -arrows-.
- Remove the bracket -1 and 2-.
Installing
Install in reverse order of removal.
Tightening Specifications
- Refer to → Chapter "Overview - Lock Carrier"
Reinforcement Brace, Removing and Installing
Removing
- Remove the air filter housing. Refer to → Engine Mechanical; Rep. Gr.23; Air Filter; Air Filter Housing, Removing and Installing or → Engine Mechanical; Rep. Gr.24; Air Filter; Air Filter Housing, Removing and Installing.
- Remove the headlamp cover. Refer to → Chapter "Headlamp Cover, Removing and Installing".
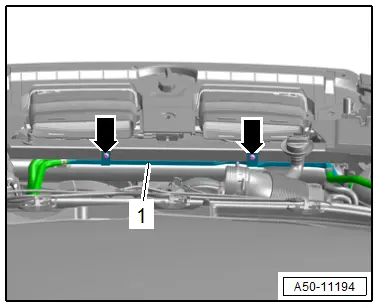
- Vehicles with high-voltage system 4-cylinder engine: remove the bolts -arrows- and free up the coolant line -1-.
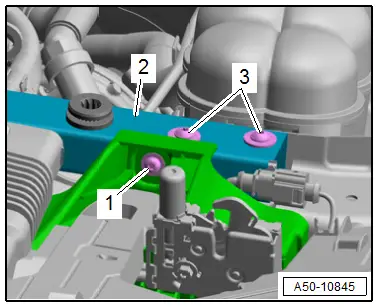
- Free up the wiring harness.
- Remove the bolts -1 and 3-.
- Remove the reinforcement brace -2-.
Installing
Install in reverse order of removal.
Tightening Specifications
- Refer to → Chapter "Overview - Lock Carrier"

