Audi Q7: Noise Insulation
Overview - Noise Insulation
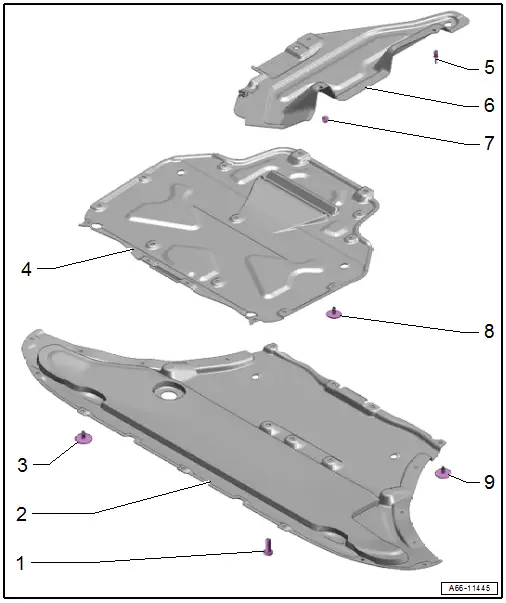
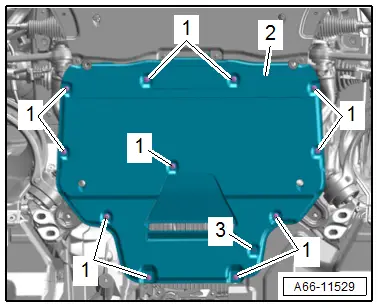
1 - Bolt
- 6 Nm
- Quantity: 3
2 - Front Noise Insulation
- There are different versions. Refer to the Parts Catalog.
- Removing and Installing. Refer to → Chapter "Noise Insulation, Removing and Installing, Front".
3 - Bolt
- 2.5 Nm
- Quantity: 13
4 - Rear Noise Insulation
- There are different versions. Refer to the Parts Catalog.
- Removing and Installing. Refer to → Chapter "Noise Insulation, Removing and Installing, Rear".
5 - Expanding Rivet
6 - Left Noise Insulation
- Removing and Installing. Refer to → Chapter "Noise Insulation, Removing and Installing, Left".
7 - Nut
- 2.5 Nm
- Quantity: 2
8 - Bolt
- 2.5 Nm
- Quantity: 12
9 - Bolt
- 2.5 Nm
- Quantity: 4
Noise Insulation, Removing and Installing
Noise Insulation, Removing and Installing, Front
Removing
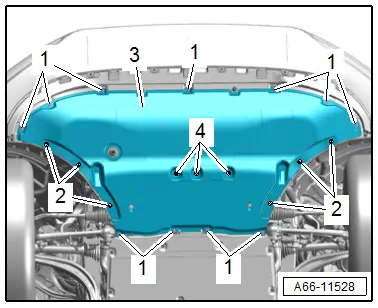
- Remove the bolts -1, 2, 4-.
- Remove the front noise insulation -3-.
Installing
Install in reverse order of removal and note the following:
Vehicles with Parking Heater:
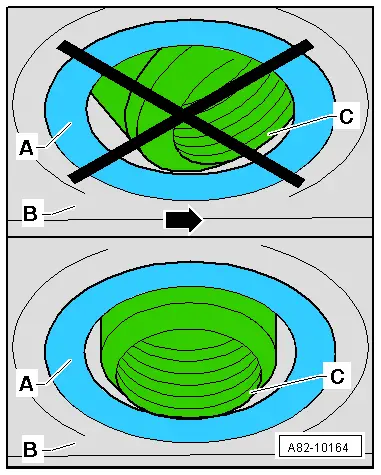
- The rubber grommet -A- must be without tension in the noise insulation -B- and the exhaust pipe must be flush with the rubber grommet -A- or hang slightly out of the rubber grommet -A-.
- The mouth of the exhaust pipe -C- must be installed when passing through in the sound enclosure -B- installed grommet -A- right-angled to the sound enclosure -B-.
- The exhaust pipe opening -C- must not point in the direction of travel -arrow- (or else the driving wind from a moving vehicle could cause an increased counter pressure in the exhaust system).
Tightening Specifications
- Refer to → Chapter "Overview - Noise Insulation"
Noise Insulation, Removing and Installing, Left
Removing
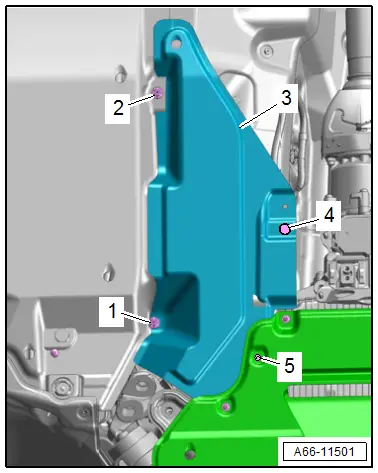
- Remove the nuts -1 through 2- and bolt -5-.
- Remove the expanding rivet -4-.
- Remove the left noise insulation -3-.
Installing
Install in reverse order of removal.
Tightening Specifications
- Refer to → Chapter "Overview - Noise Insulation"
Noise Insulation, Removing and Installing, Rear
Removing
- Remove the bolts -1 and 3-.
- Remove the rear noise insulation -2-.
Installing
Install in reverse order of removal.
Tightening Specifications
- Refer to → Chapter "Overview - Noise Insulation"

