Audi Q7: Door Arrester, Removing and Installing
 Caution
This procedure contains mandatory replaceable parts. Refer to component overview prior to starting procedure.
Removing
- Move the door window into the "closed" position.
- Remove the door trim panel. Refer to → Body Interior; Rep. Gr.70; Front Door Trim Panels; Front Door Trim Panel, Removing and Installing.
- Remove the speaker. Refer to → Communication; Rep. Gr.91; Sound System; Component Location Overview - Sound System.
- Tape off the A-pillar in the door arrester area using adhesive tape, so that the paint will not be damaged.
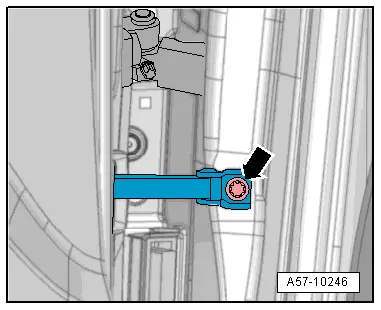
- Remove the door arrester bolt -arrow-.
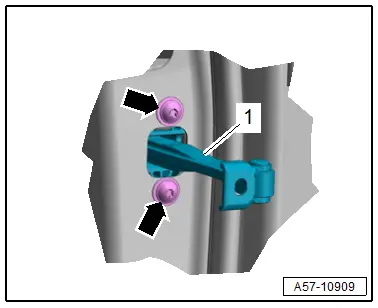
- Remove the bolts -arrows- and remove the door arrester -1- toward the inside.
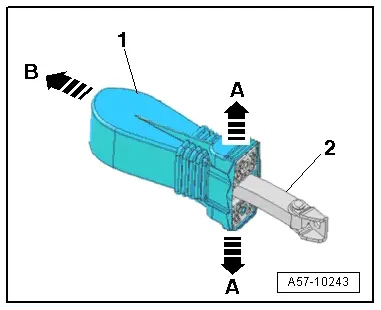
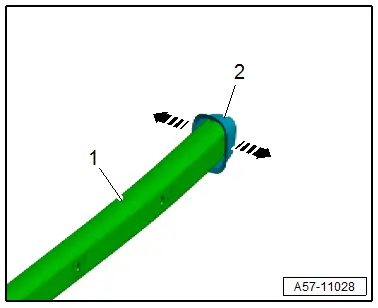
- Pull the cap -1- slightly to the side -A arrows- and remove it from the door arrester -2--arrow B-.
Installing
Install in reverse order of removal and note the following:
- Door arrester installation position. Refer to → Fig.
- Cap installation position. Refer to → Fig.
Tightening Specifications
- Refer to → Chapter "Overview - Door"
Impact Member, Removing and Installing
Removing
- Remove the front door trim panel. Refer to → Body Interior; Rep. Gr.70; Front Door Trim Panels; Front Door Trim Panel, Removing and Installing.
- Remove the door. Refer to → Chapter "Door, Removing and Installing".
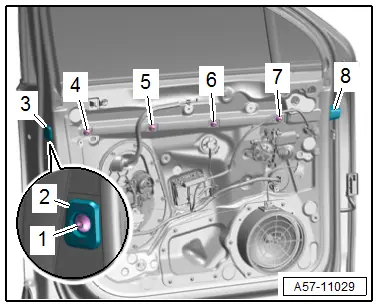
- Pry out the B-pillar cover -3-.
- Remove the bolts -1, 4 and 5-.
- Remove the member plate -2-.
- Remove the impact member -arrow- forward.
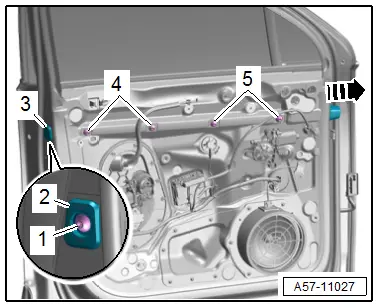
- Release the retainers -arrows- and remove the A-pillar cover -2- from the impact member -1-.
Installing
Install in reverse order of removal and note the following:
- Install the impact member in the sequence: -1 through 5-.
Step
- Insert the impact member into the door.
- Tighten the screw -4- to 1.5 Nm.
- Insert the member plate -2- and tighten the screw -1-.
- Tighten the screws in the following sequence: -4, 5, 6 and 7-.
- Press on the covers for the A-pillar -8- and B-pillar -3- until they audibly engage.
Tightening Specifications
- Refer to → Chapter "Overview - Door"

