Audi Q7: Glove Compartment Handle, Removing and Installing
Glove Compartment Handle, Removing and Installing
Special tools and workshop equipment required
- Pry Lever -80-200-
- Small screwdriver (approximately 70 mm long) or TORX screwdriver T10 (approximately 80 mm long) commercially available
Removing
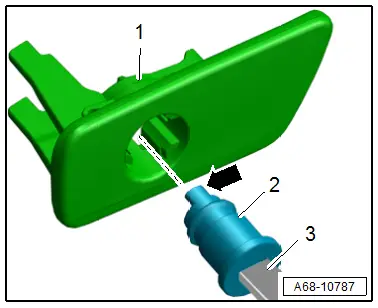
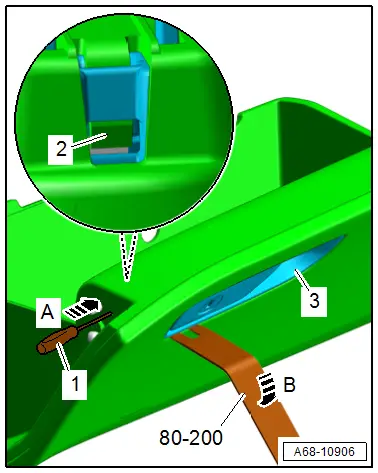
- Release the hooks -2- for the glove compartment handle -arrow A- through the opening on the side on the glove compartment lid with a small screwdriver -1- (approximately 70 mm long) or TORX screwdriver T10 (approximately 80 mm long).
- Carefully disengage the glove compartment handle -3- at the same time with the -80-200- from the hooks -arrow B-.
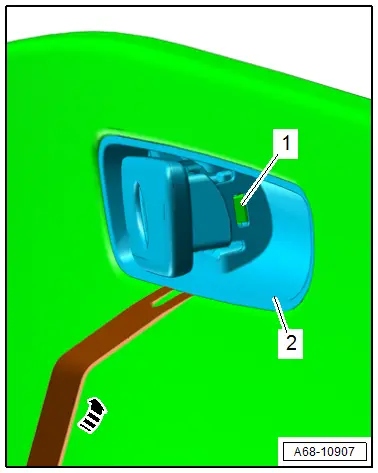
- Press the glove compartment handle and release retaining the hook -1- at the side of the glove compartment opener using a screwdriver.
- Pry up the glove compartment handle -2- carefully from the glove compartment lid -arrow- with the - 80-200-.
Installing
Install in reverse order of removal.
Installation instructions: for example tightening specifications, replacing components. Refer to → Chapter "Overview - Glove Compartment".
Glove Compartment Handle Lock Cylinder, Removing and Installing
Removing
- Remove the glove compartment handle. Refer to → Chapter "Glove Compartment Handle, Removing and Installing".
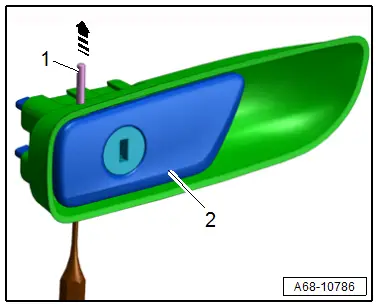
- Drive out the axle -1- from the locating bore with a punch in the direction of the -arrow-.
- Remove the glove compartment handle -2- with the lock cylinder.
 Caution
Risk of destroying the lock cylinder.
The lock cylinder may only be removed and installed with the key properly inserted to prevent the tumblers and pressure springs from falling out.
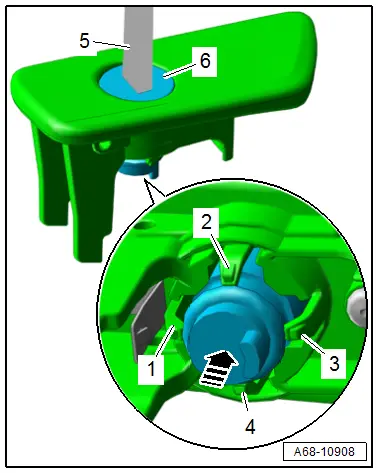
- Insert the key -5- into the lock cylinder.
- Carefully release the catches -1 through 4- one after the other using a small screwdriver and remove the lock cylinder -6- at the same time -arrow-.
Installing
- Insert the key -3- into the new lock cylinder -2-.
- Remove the protective cap from the new lock cylinder.
- Insert the lock cylinder into the glove compartment handle -1- until it engages. Pay attention to the installation position of the pin.
- The pin -arrow- on the lock cylinder points upward.
Further installation is the reverse order of removal.
Installation instructions: for example tightening specifications, replacing components. Refer to → Chapter "Overview - Glove Compartment".