
Audi Q7: Left and Right Front Turn Signal Bulb -M5-/-M7-, Removing and Installing
This procedure description only refers to the HID headlamp.
Removing
- Remove the headlamp cover. Refer to → Body Exterior; Rep. Gr.63; Front Bumper.
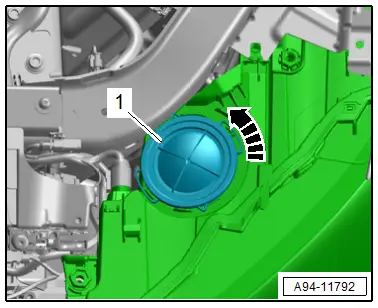
- Turn the housing cover -1- counter-clockwise in direction of -arrow- and remove it from the headlamp housing.
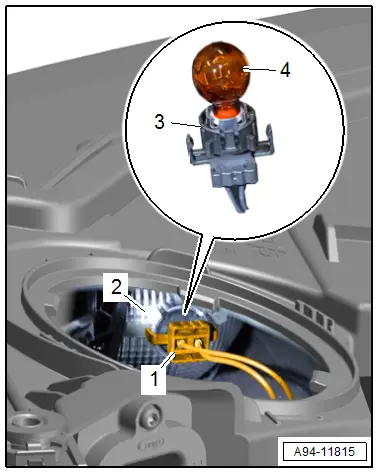
- Remove the bulb socket -1- from the housing -2-.
- Remove the bulb -4- from the bulb socket -3-.
Installing
Install in the reverse order of removal while noting the following:
- Install the new bulb. Be careful not to touch the bulb glass with bare hands.
- Close the housing cover clockwise.
Left and Right Daytime Running Lamp and Position Lamp LED Module -L176-/-L177-, Removing and Installing
This procedure description only refers to the HID headlamp.
Removing
- Remove the headlamp housing. Refer to → Chapter "Headlamp Housing, Removing and Installing".
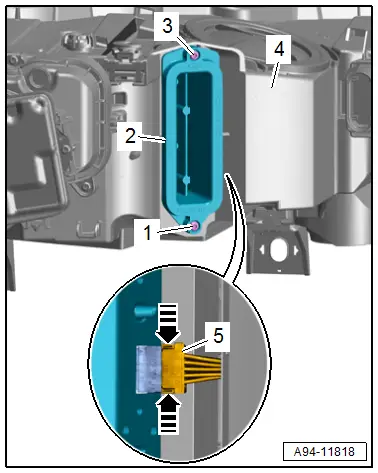
- Remove the bolts -1 and 3-.
- Remove the LED module -2- from the headlamp housing -4-.
- Disconnect the connector -5- by pressing the release buttons in direction of -arrows-.
Installing
Install in the reverse order of removal while noting the following:
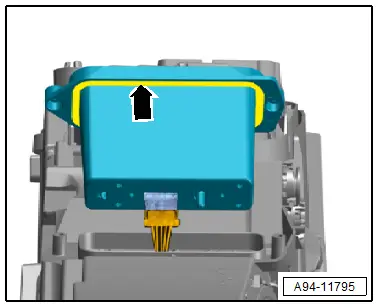
- Check the seal -arrow- for damage.
- Pay attention to the installation of the seal -arrow- must be positioned on the headlamp housing.
Tightening Specifications
- Refer to → Chapter "Overview - Headlamps, HID Headlamps"
Left and Right Front Fog Lamp Bulb -L22-/-L23-, Removing and Installing
This procedure description only refers to the HID headlamp.
Removing
- Remove the headlamp cover. Refer to → Body Exterior; Rep. Gr.63; Front Bumper.
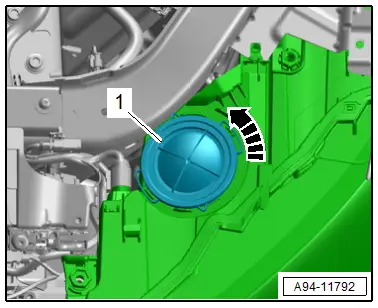
- Turn the housing cover -1- counter-clockwise in direction of -arrow- and remove it from the headlamp housing.
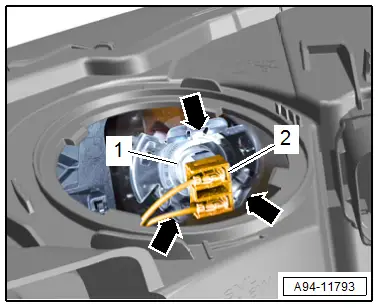
- Remove the bulb -1- from the spring clips -arrows-.
- Disconnect the connector -2- from the bulb.
Installing
Install in the reverse order of removal while noting the following:
- Insert the new bulb in the socket. Do not touch the bulb glass with bare hands.
- Close the housing cover clockwise.
Left and Right HID Headlamp Bulb -L13-/-L14-, Removing and Installing
The HID headlamp bulb is integrated in the HID headlamp control module. It cannot be replaced alone.
Removing
- Remove the front wheel housing liner front section. Refer to → Body Exterior; Rep. Gr.66; Wheel Housing Liner; Front Wheel Housing Liner, Removing and Installing.
- Remove the Left Light Control Module -J1018- or Right Light Control Module - J1023-. Refer to → Chapter "Left and Right Light Control Module -J1018-/-J1023-, Removing and Installing".
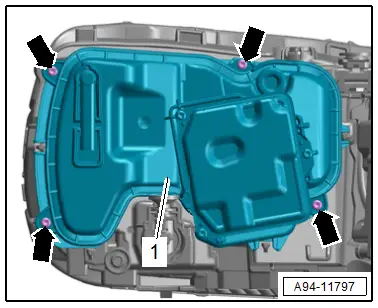
- Remove the bolts -arrows-.
- Unclip the connector from the control module for the light from the housing cover -1- to do so press the four tabs. Remove the housing cover -1-.
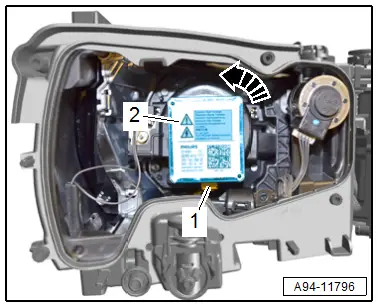
- Turn the HID headlamp bulb -2- counter-clockwise in direction of -arrow- and remove it from the housing.
 CAUTION
Extremely dangerous due to high-voltage.
With the headlamps switched on the HID headlamp components marked with the yellow high-voltage symbol are under high voltage. Electric shock is possible from contact with the components.
- With the illumination switched on never contact the components marked with the yellow high-voltage symbols.
- When performing procedures switch off the ignition and all electrical equipment, and place the ignition key outside of the vehicle.
- Do not operate the flashers.
- Disconnect the connector -1-.
Installing
Install in the reverse order of removal while noting the following:
- Insert the new HID headlamp bulb into the housing. Do not touch the bulb glass with bare hands while doing so.
- Installation position: the electrical connection points downward.
Tightening Specifications
- Refer to → Chapter "Overview - Headlamps, HID Headlamps"

