Audi Q7: Rear Door Trim Panel, Removing and Installing
Special tools and workshop equipment required
- Wedge Set -T10383-
Removing
- Switch off the ignition.
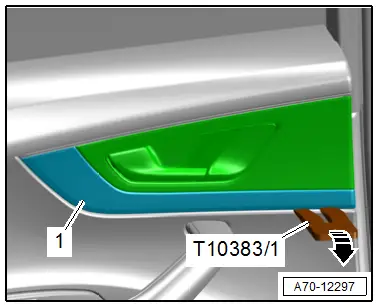
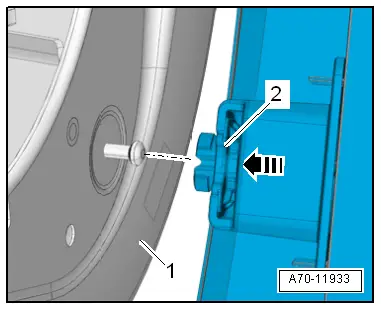
- Unclip the trim -1- using the -T10383/1--arrow-, disengage the trim at the door trim panel and remove it.
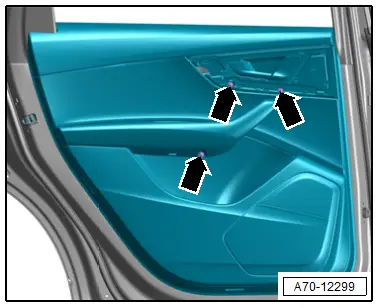
- Remove the bolts -arrows-.
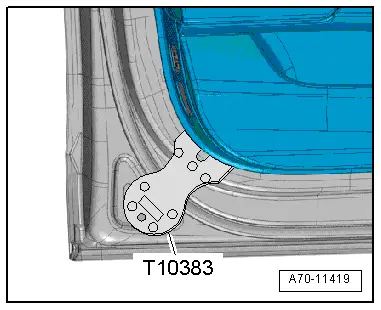
- Using the -T10383- unclip at lower rear in the radius beginning from the door by inserting the wedge between door trim and door in the area of the clip.
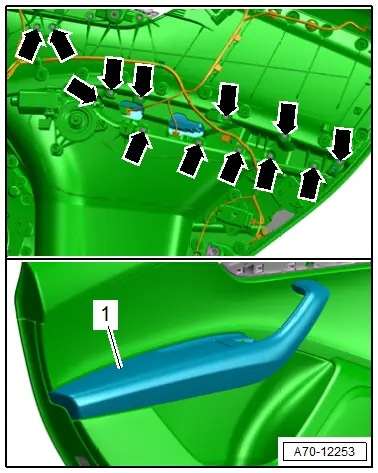
Unclip the remaining clips -1- along the door trim panel from the door, the mark shows the position of the clips.
- Pull the door trim panel -2- slightly off the door all the way around.
- The clips must not be left in the inside door.
- Disengage and remove the upper door trim panel from the door -arrows- on the window recess.
- Vehicles equipped with a speaker: disconnect the connector for the speaker.

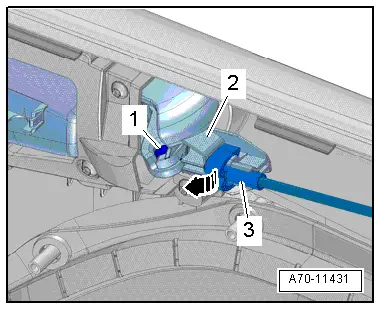
- Unclip the cable -3- carefully from the interior door mechanism -2-.
- Swivel the interior door mechanism cable -arrow-.
- Disengage the ends of the cable -1- from the inside door release mechanism.
- Disconnect the connectors -1, 2 and 3- from the door control module by pressing the release.
- Remove the door trim.

Installing
Install in reverse order of removal. Note the following:
- Position the door trim on the window recess and press it down firmly.
- Carefully position the door trim panel clips -2- all around the door and press the door trim onto the door -1- until it engages audibly on the mounting points -arrows-.
Installation notes, for example tightening specifications, replacing components. Refer to → Chapter "Overview - Rear Door Trim Panel".
Rear Pull Handle, Removing and Installing
Special tools and workshop equipment required
- Wedge Set -T10383-
Removing
- Remove the door trim panel. Refer to → Chapter "Rear Door Trim Panel, Removing and Installing".
- Place the trim panel on a soft surface.
- Remove the insulation mat.
- Disconnect the connectors at the rear of the door trim panel.
- Remove the bolts -arrows-.
- Remove the pull handle with the armrest -1- from the door trim panel.
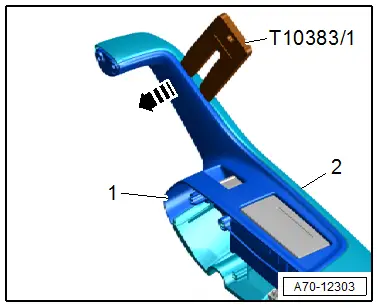
- Unclip the switch mount -1- from the pull handle with the armrest -2- using the -T10383/1- in direction of -arrow- and remove it.
Installing
Install in reverse order of removal.
Installation notes, for example tightening specifications, replacing components. Refer to → Chapter "Overview - Rear Door Trim Panel".

