Audi Q7: Rear Bumper Cover, Removing and Installing
Bumper Cover, Removing and Installing
- Depending on the equipment version, the following additional work must be performed.
Removing
- Remove the luggage compartment left trim panel. Refer to → Body Interior; Rep. Gr.70; Luggage Compartment Trim Panels; Luggage Compartment Side Trim Panel, Removing and Installing.
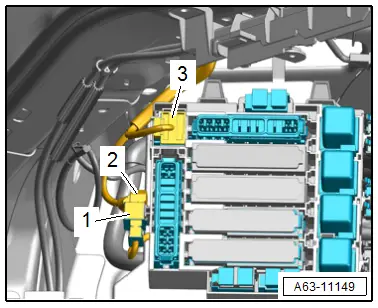
- Disconnect the connectors -2 and 3-.
- Free up the connector -1-.
- Push the grommet toward the outside.
- Remove the rear wheel cover. Refer to → Chapter "Wheel Cover, Removing and Installing, Rear ".
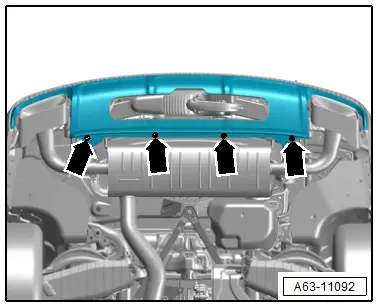
- Remove the bolts -1, 2, and 3-.

- Remove the bolts -arrows-.
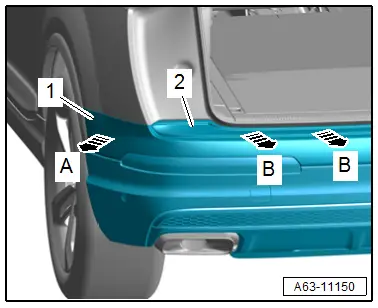
- Disengage the side section -1- outward from the side panel -arrow A- and remove the bumper cover -2- toward the rear -B arrows-.
- Guide out the wiring harness from the body guide.
- Lay the bumper cover on a soft surface.
Installing
Install in reverse order of removal and note the following:
For versions with lane change assistance, the following additional work is required: Refer to
- Calibrate the lane change assistance. Refer to → Electrical Equipment; Rep. Gr.96; Lane Change Assistance; Lane Change Assistance, Calibrating.
Tightening Specifications
- Refer to → Chapter "Overview - Bumper Cover"
Bumper Cover Upper Section, Removing and Installing
- Depending on the equipment version, the following additional work must be performed.
Removing
- Remove the bumper cover. Refer to → Chapter "Bumper Cover, Removing and Installing".
- Remove the bumper cover lower section.
Installing
Install in reverse order of removal and note the following:
For versions with lane change assistance, the following additional work is required:
- Calibrate the lane change assistance. Refer to → Electrical Equipment; Rep. Gr.96; Lane Change Assistance; Lane Change Assistance, Calibrating.
Bumper Cover Lower Section, Removing and Installing
- Depending on the equipment version, the following additional work must be performed.
Removing
- Remove the rear wheel cover. Refer to → Chapter "Wheel Cover, Removing and Installing, Rear ".
- Remove the bolts -1, 2, and 3-.
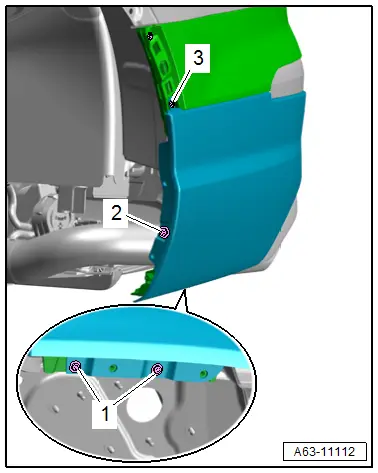
- Remove the bolts -arrows-.

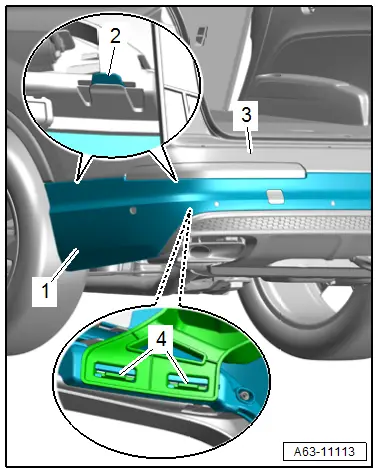
- Release the catches -2 and 4-.
- Remove the bumper cover lower section -1- from the bumper cover upper section -3-.
- Place the bumper cover lower section on a soft surface.
Installing
Install in reverse order of removal and note the following:
For versions with lane change assistance, the following additional work is required:
- Calibrate the lane change assistance. Refer to → Electrical Equipment; Rep. Gr.96; Lane Change Assistance; Lane Change Assistance, Calibrating.
Tightening Specifications
- Refer to → Chapter "Overview - Bumper Cover"

